
Adding New Activities
Adding a New Activity
Adding an Activity from an existing grant (linking)
Remove an Activity from an existing grant (unlinking)
Adding Activity Budgets
Editing and Deleting Activity Budgets
Submitting a Work Plan
Adding Activity Details
Adding Activity Detail attributes
Mapping Activity Details
Adding Activity Detail indicators
Adding New Activities
The first step in completing the work plan development or grant reporting requirements in eLINK is to create Activities. Grant Activities contain detailed descriptions of the various Activities proposed to be completed under the project and budget attributes. Once the grant agreement is executed and work has begun under the grant, the Grant Activities section is where detailed reporting of grant results, expenditures, and indicator reporting will occur. Before getting started, please see your grant's Reporting Profile, or eLINK Reporting at a Glance for specific requirements for each grant.
Begin by navigating to Grants >Grants in the left menu. This will bring you to the list of your active grants.
Click the Edit button adjacent to the grant you wish to edit, and the Grant Activities page will open. Click on the “Add a New Activity” button. This will open the “Add New Activity” page.
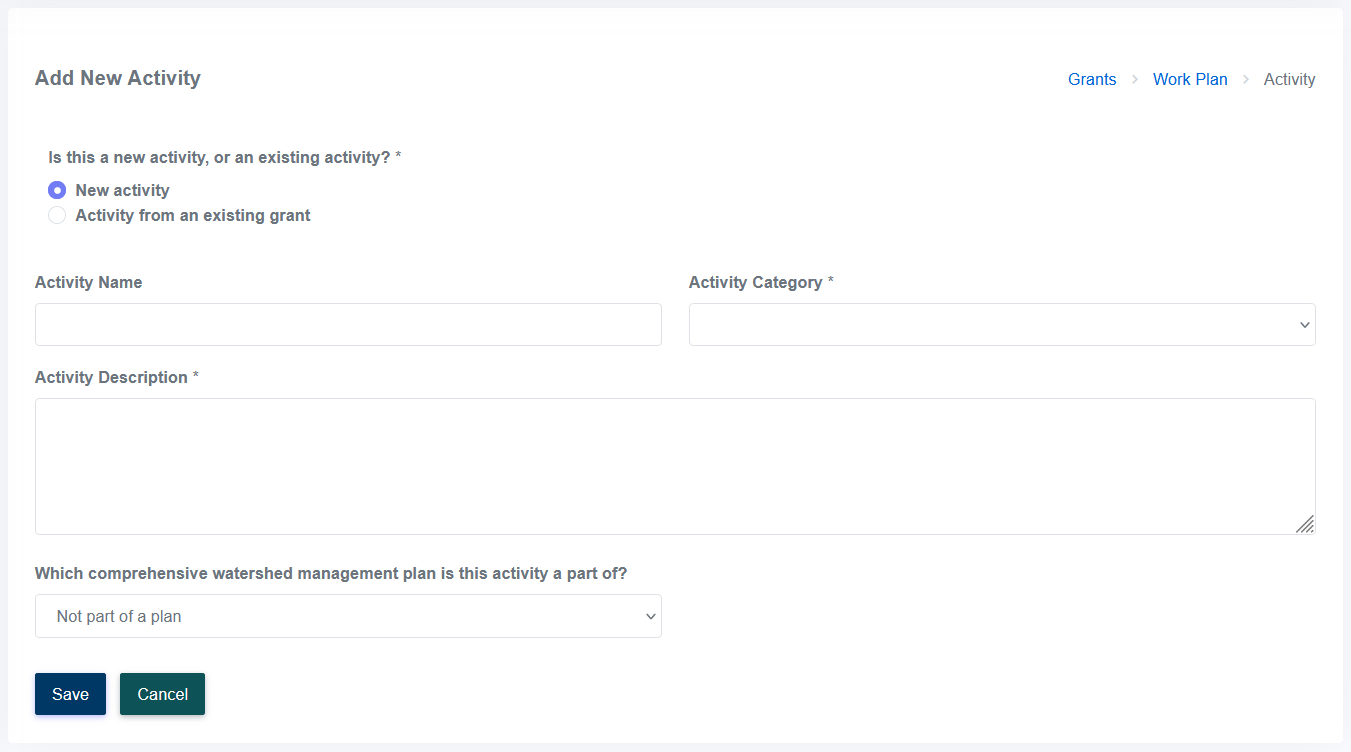
To begin, you will need to indicate if this is a New Activity, or an Activity from an Existing Grant.
Add a New Activity
To add a New Activity, you will need to complete the following fields:
- New Activity Name
- Activity Category
- Activity Description
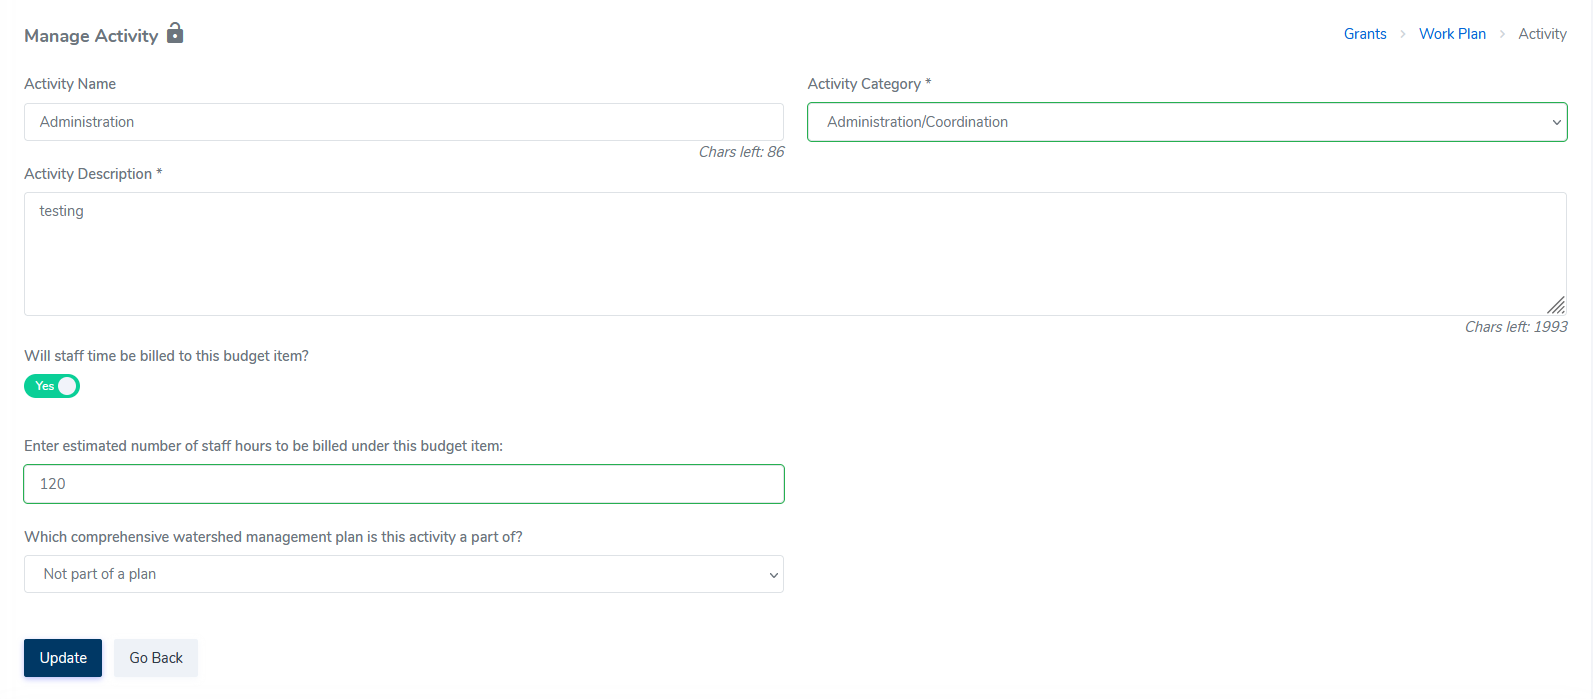
- If this is a Clean Water Fund (CWF) grant, indicate whether staff time will be billed. If yes, enter the estimated number of staff hours for this activity.
Example of a CWF grant activity, with staff time entered:
5.If applicable, select the comprehensive watershed management plan that the Activity addresses
6.Some grants may have allocation-specific questions; complete these required fields, if applicable
7.Click Save.
8. A successfully saved confirmation appears.
Add an Activity from an Existing Grant ("linking"):
Identify the grant where the activity was first recorded (under which the activity you are funding originated). Note down grant name and grant ID, as this information will be required when linking activities.
We recommend grouping and splitting activities that are intended to be linked see Grouping and Splitting Activities guidance eLINK Guidance: Grouping and Splitting Activities for further details.
Email your BC to request unlocking the work plan of the grant that the activity will be linked to. This is an opportunity to discuss the activity to be linked and verify its eligibility.
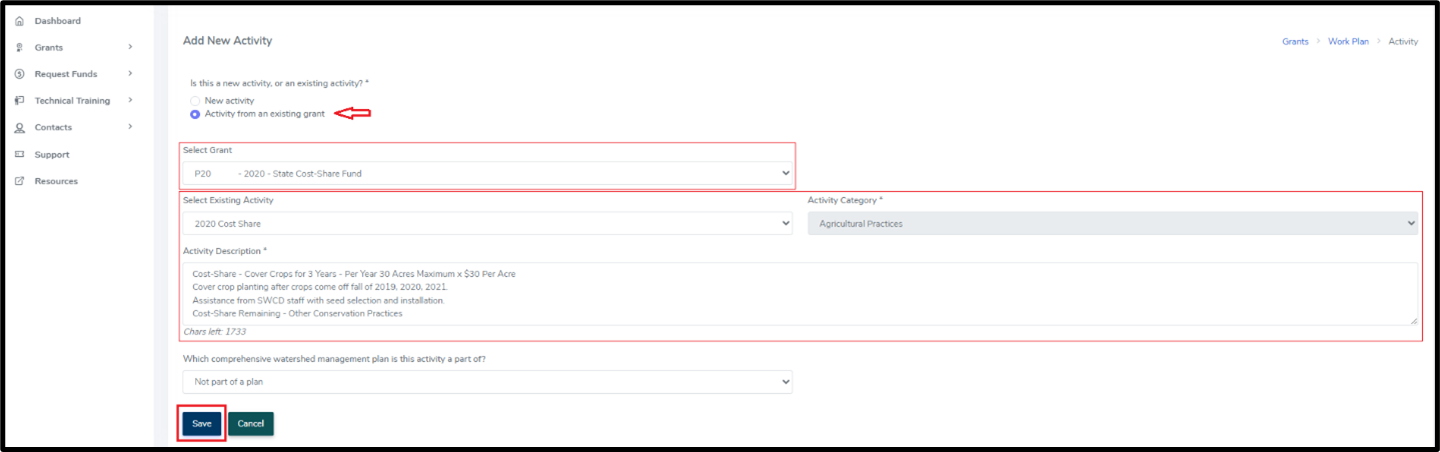
Click on the Add a New Activity button.
- Select “Activity from an existing grant”.
- From the Select Grant drop-down list, select the grant that contains the activity you want to link.
- Select the Existing Activity from the drop-down list.
- The Activity Category and Activity Description will auto fill based on your selection.
Click Save.
- Click OK and scroll down to Add New Activity Budget.
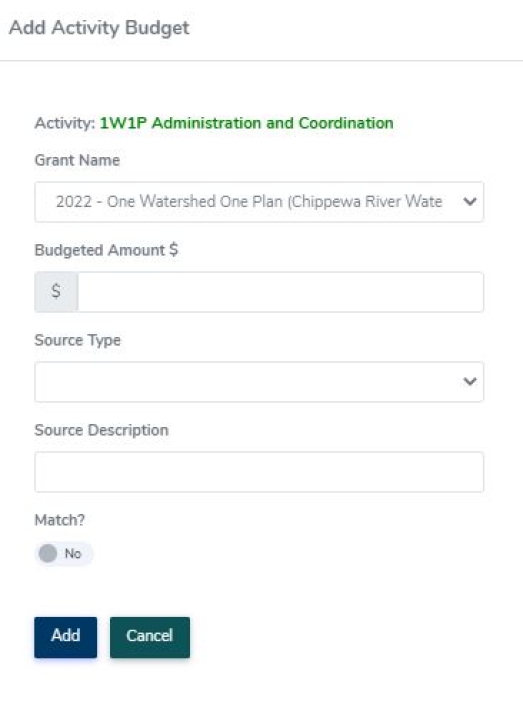
Click Add New Activity Budget button.

- From the Grant Name drop down list select the grant you want to add the budgeted amount to.
- Enter the budgeted amount.
- Choose the Source Type. The Source Description will auto-populate.
- Click Add.

This activity is now successfully linked to the grant.
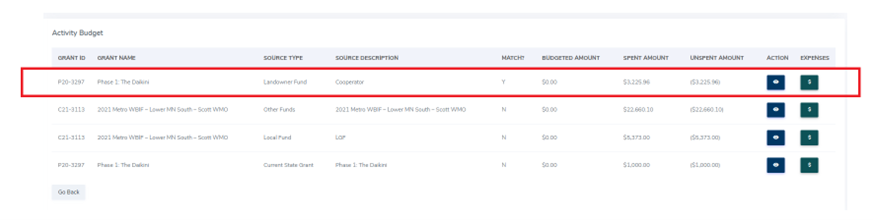
Note - When linking grant activities, you may encounter a situation where the grant that used the match (PXX-XXXX or CXX-XXXX) shows Match? = Y. If you open the linked activity on the other grant (PXX-XXXX or CXX-XXXX), it will display Match? = N, because the match can only be applied once and cannot be used on both grants. The Progress Report will display correctly regardless of which grant the report is run under.
Remove an Activity from an Existing Grant ("unlinking")
Before starting the process of unlinking an activity, ensure the following condition is met:
Work Plan Status: The Work Plan (if applicable) must be in In Process status. Activities cannot be unlinked or edited if the Work Plan is in Submitted or Approved status.
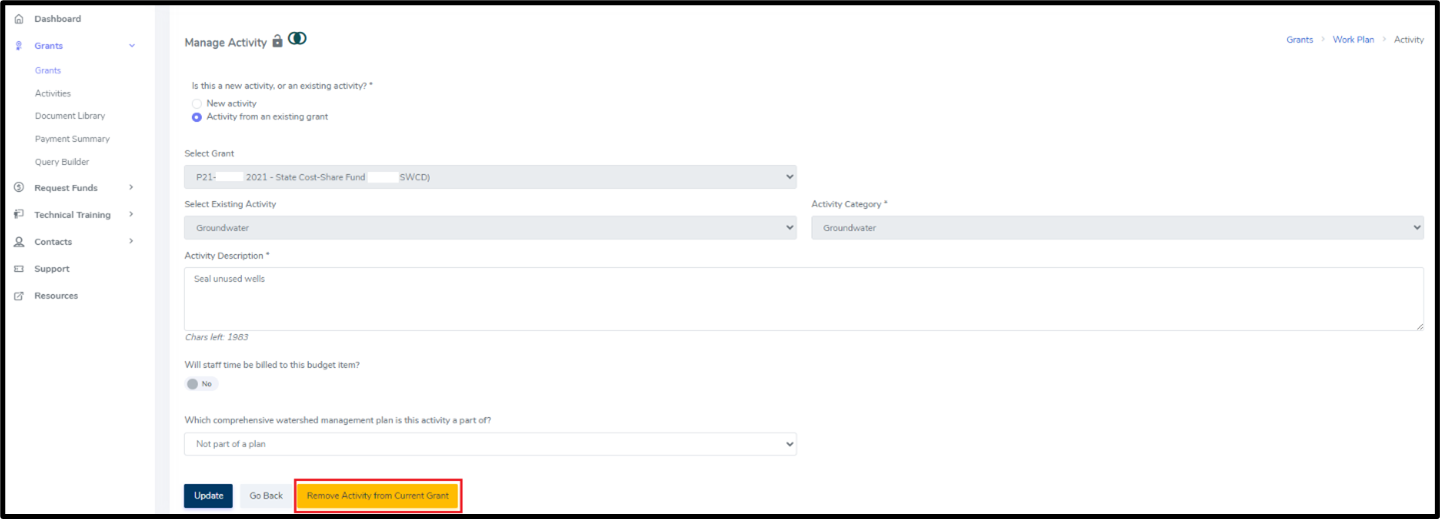
Search the grant where the activity was linked to and click View/Edit button.
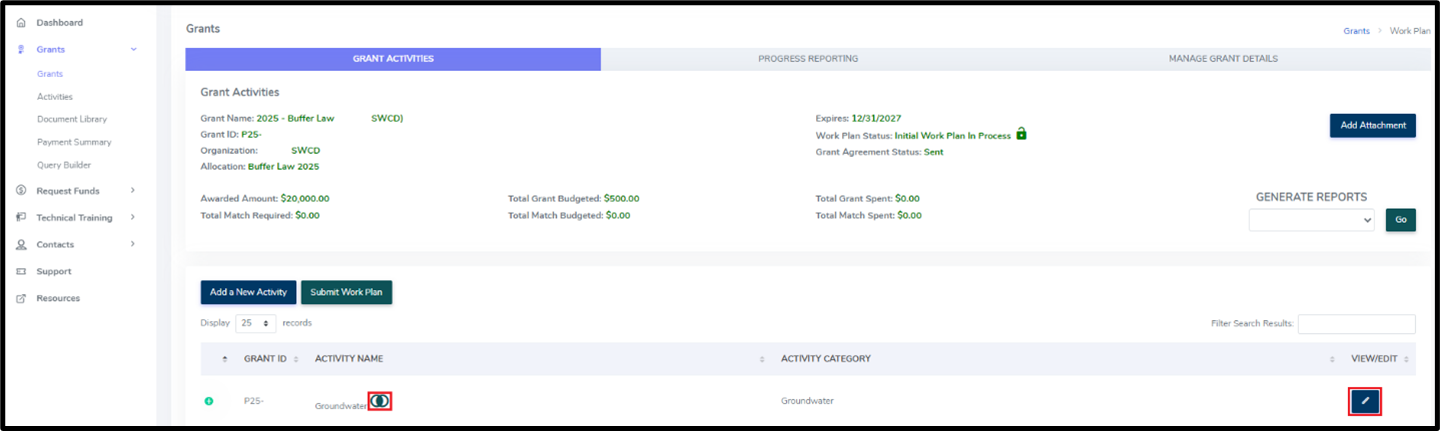
Click the Remove Activity from Current Grant button to unlink the activity.
Click Ok.
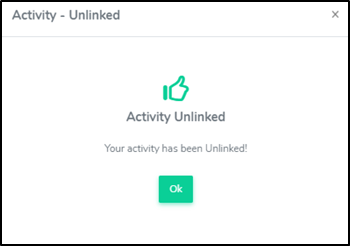
This activity has been successfully unlinked.
Troubleshooting
If the Remove Activity from Current Grant button is not visible:
- Ensure you are working within the correct grant, specifically the one where the activity was linked to.
Do Not proceed with deleting activities and budgets on your own. Contact your BC for guidance and assistance.
Adding Activity Budgets
To add an Activity Budget to the Activity, click on the Add New Activity Budget button. In the popup screen, the active grant title will be shown. Enter:
- Budgeted Amount
- Source Type:
- Current State Grant
- Federal Funds
- Landowner Fund
- Local Fund
- Other State Funds Not in eLINK
- Source Description: If "Current State Grant" was selected, this field will be automatically populated with the grant title. Otherwise, enter a clear, concise description with enough specificity so that you can differentiate between source types.
- Match: Indicate if this Activity Budget is part of the active grant's match. Current State Grant and Other State Funds are not eligible as match.
- When two grants are linked in eLINK, local funds entered under the first grant (Grant A) will appear in both grants’ activity budgets. These funds count as match only for the active grant in which they were originally entered, so the “Match?” column shows Y in Grant A and N in Grant B. This behavior aligns with program rules that prohibit using the same funds as match for multiple state grants. Note that the progress report may display this field differently than the Activity Budget.
- When two grants are linked in eLINK, local funds entered under the first grant (Grant A) will appear in both grants’ activity budgets. These funds count as match only for the active grant in which they were originally entered, so the “Match?” column shows Y in Grant A and N in Grant B. This behavior aligns with program rules that prohibit using the same funds as match for multiple state grants. Note that the progress report may display this field differently than the Activity Budget.
- Click Add. You will be returned to the Activity screen, and the new Activity Budget row will appear in the Activity Budget grid.
- Repeat these steps as many times as necessary to add all state grant, matching and other funds.
Editing and Deleting Activity Budgets
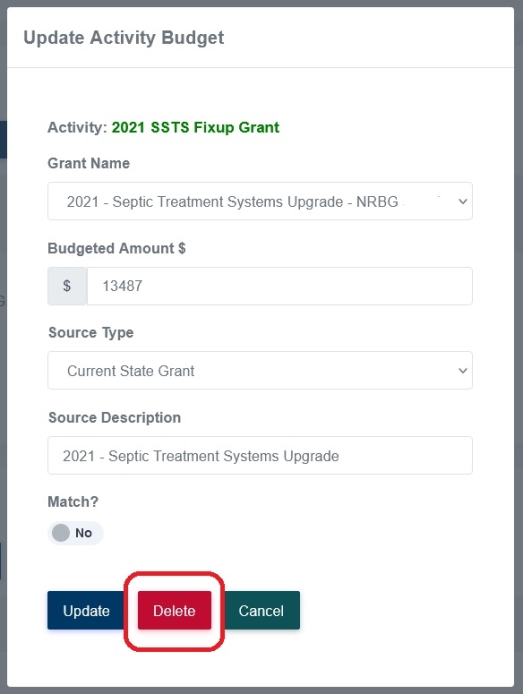
To edit an Activity Budget, click the "Edit" action icon. This will open the Activity Budget.
Note that if your grant has a work plan requirement, and the work plan is in Submitted or Approved status, this may not be editable; however, you can click the View action icon to view the details. Activities budgets are locked by BWSR when a workplan is required for a grant and the workplan has been approved. Changing these budgeted amounts requires a work plan modification or amendment. Please work with your Board Conservationist for assistance.
Within the Update Activity Budget window, the delete button Activity Budget Row icon can be used to remove an Activity Budget. This deletes the budget row for an individual funding source but does not delete the activity. Be aware that once Activity Budget information is deleted it cannot be restored. This function is not available when the workplan is locked.
Submitting a Work Plan
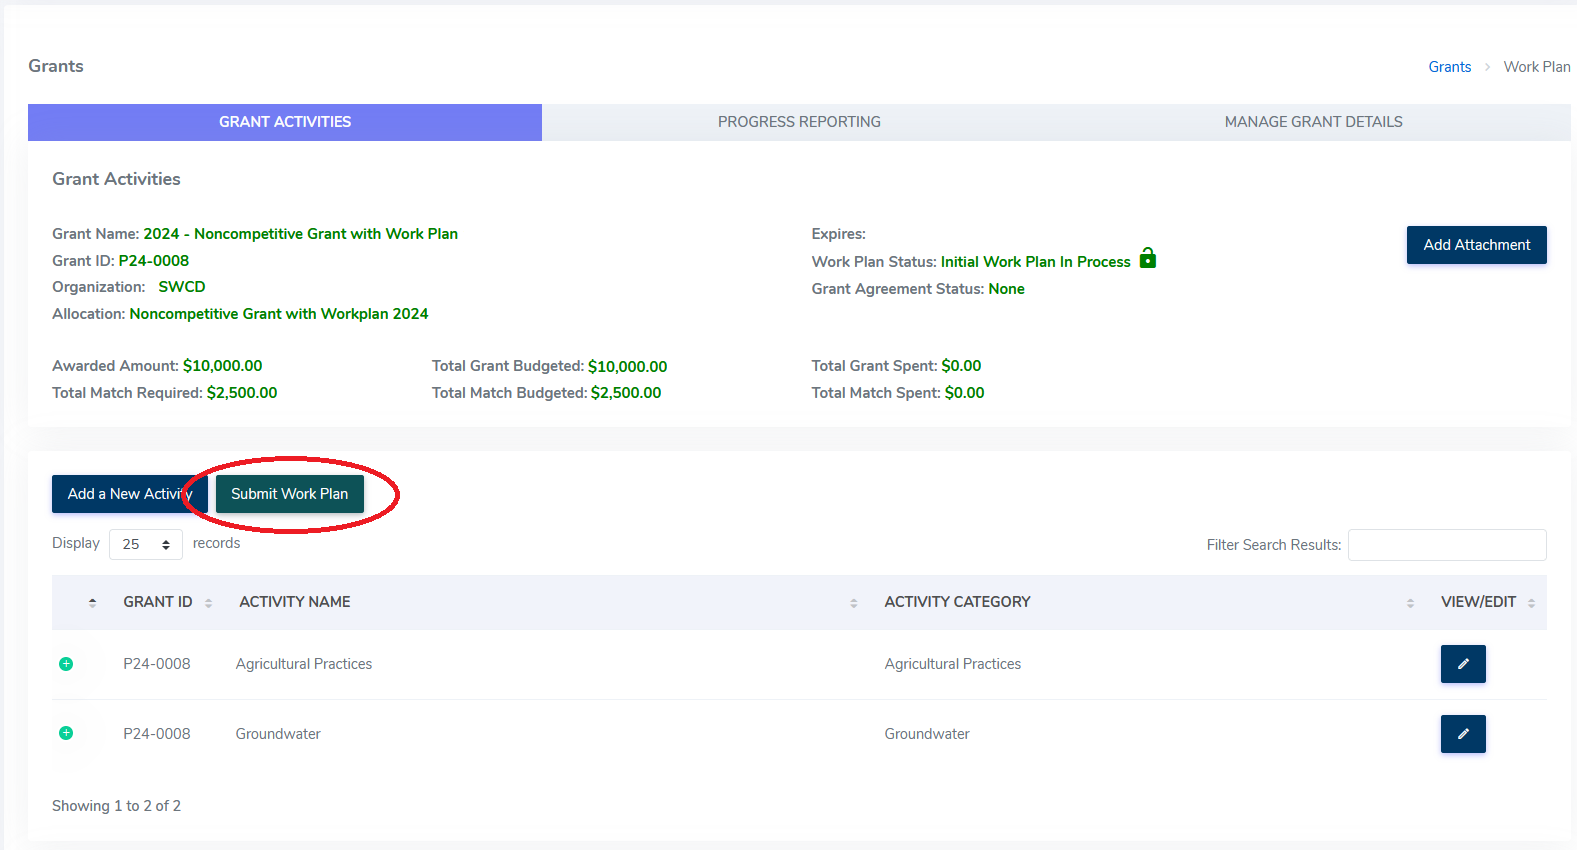
For grants that have a work plan requirement, the grant must be fully budgeted, including match, in order to submit the work plan. Remember, work may not begin on the grant until the work plan has been approved and you have an executed grant agreement.
To submit the work plan, go to the Grant Activities tab. Once the Total Grant Budgeted equals the Awarded Amount, and the Total Match Budgeted meets the Total Match Required, you can submit your work plan by clicking the "Submit Work Plan" button.
Adding Activity Details
Activity Details should be completed after the practice is installed or completed.
Near the bottom of the Add/Manage Activity screen, click the Add New Activity Detail icon to enter details about on-the-ground practices; this will take you to a new screen. Activity details are a subset of individual elements or practices that make up an activity as a whole.
This step is not required for all activities. Activity Details are only needed when there are on-the-ground practices. For example, activity categories Administration and Project Development--activities categories that typically reflect staff time--don’t have Activity Details. See the Chart of Practices by Activity Category to help determine if Activity Details are applicable for a given activity category.
Adding Activity Detail attributes
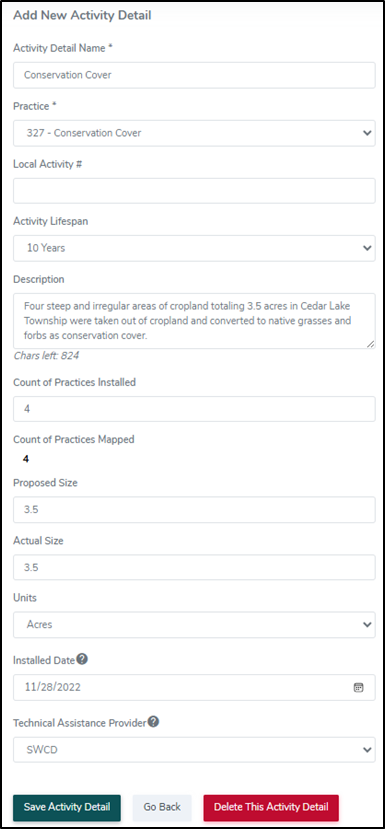
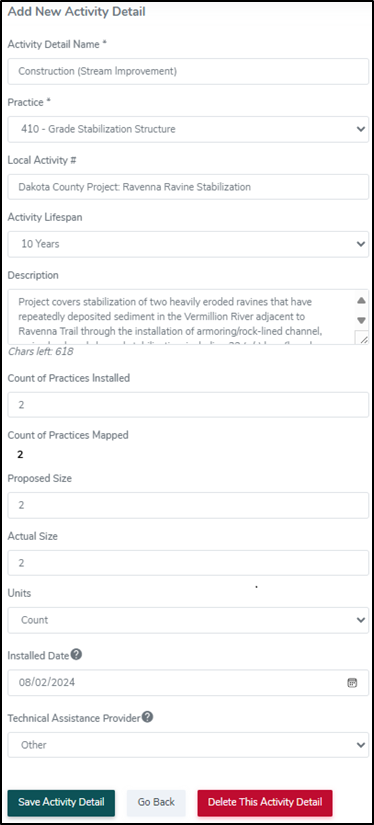
Within the Add New Activity Detail screen, enter or select:
1. Activity Detail Name (avoid using landowner names when possible) - Assign a name to the activity detail. This can be any name that best describes the activity being reported. Reminder: Grantees should avoid the dissemination of private data (ex. landowner name) in eLINK.
2. Practice - Click on the drop-down menu to choose the appropriate practice associated with the activity. The available option will align with the activity created.
3. Local Activity # (optional) If you organization uses a local filing system, enter a unique identifier for record keeping purposes. This can be any number that helps track the activity internally.
4. Activity Lifespan - Estimate of how long the installed practice will be effective before requiring maintenance or replacement, based on design standards.
5. Description - Enter an explanation of the practice(s), including the purpose and setting. Example: “Surface water runoff was causing gully erosion in the field. A water and sediment control basin was constructed to capture runoff and slowly release it through an underground outlet.”
6. Count of practices installed - Record the total number of practices installed as part of the reported activity. This can be a single practice or multiple installations. Example: A cost-share contract to incorporate cover crops on four separate fields should be reported as “4” for count of practices installed.
Counts of Practices Mapped - This field will update automatically based on the number of points added to the map when mapping the practices. Ensure the mapping reflects the correct number of installed practices. The number of mapped points must match the count of practices installed.
7. Proposed and Actual Size
Proposed Size: Enter the total expected size of the practice(s) at the time of planning. The unit of measurement will be predefined based on the selected practice(s).
Actual Size: Report the total actual size of the installed practice(s). This may vary from the proposed size based on implementation conditions. If the unit of the practice(s) is “Count”, enter the total number of practices installed as the actual size.
Example 1: A cost-share contract to incorporate cover crops on four separate fields that have a total size of 160 acres should be reported as “160” for actual size.
Example 2: A cost-share contract to construct two water and sediment control basins should be reported as “2” for actual size.
8. Units - The unit of measurement (e.g., Acres, Count, linear feet) will be pre-selected based on the chosen practice. Verify that the unit matches the installed practice.
9. Installed Date - Enter the date the technical assistance provider certified that the practice was installed to applicable plans and specifications. This should reflect the actual installation date, not the reporting date.
10. Technical Assistance Provider - Select the organization or individual who provided technical assistance for the practice investigation, design and construction. Note that this does not refer to the entity that installed the practice but rather the one that assisted in planning and design.
11. Save Activity Detail; you will see a Successfully Saved confirmation.
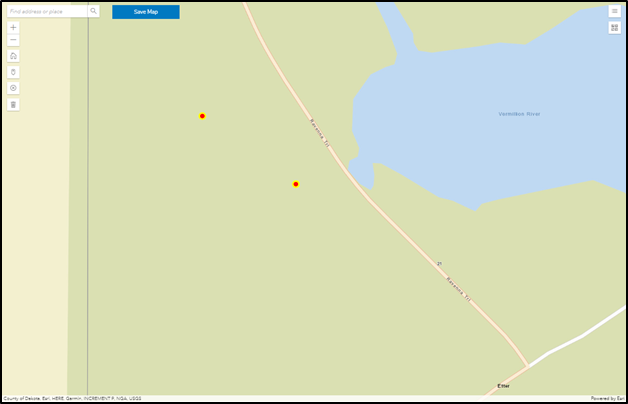
- After entering all required details, click Save Activity Detail to finalize the entry.
- Begin mapping by adding points to indicate where the practice was installed. The “Counts of Practices Mapped” field will automatically update based on the number of points placed on the map.
Example 1
Example 2
Projects with Multiple Practice Types
Certain projects may involve several “secondary” or “facilitating” conservation practices that compliment a “primary” conservation practice. In these situations, it is recommended to enter the primary conservation practice in the Activity Details and describe the facilitating practices in the Description field.
As an example, a grantee could create an Activity Details with “Prescribed Grazing” as the primary practice. In the Description field, they could identify the facilitating practices (ex. Fence, Heavy Use Protection, Watering Facility).
Projects with Non-Structural Land Management Practices
"Please see separate guidance on how to report Non-Structural Land Management Practices
Mapping Activity Details
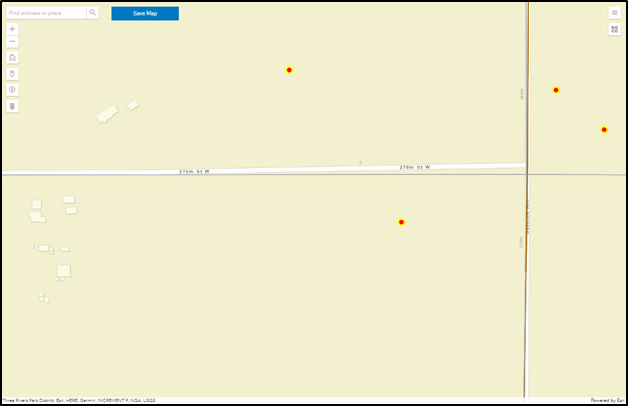
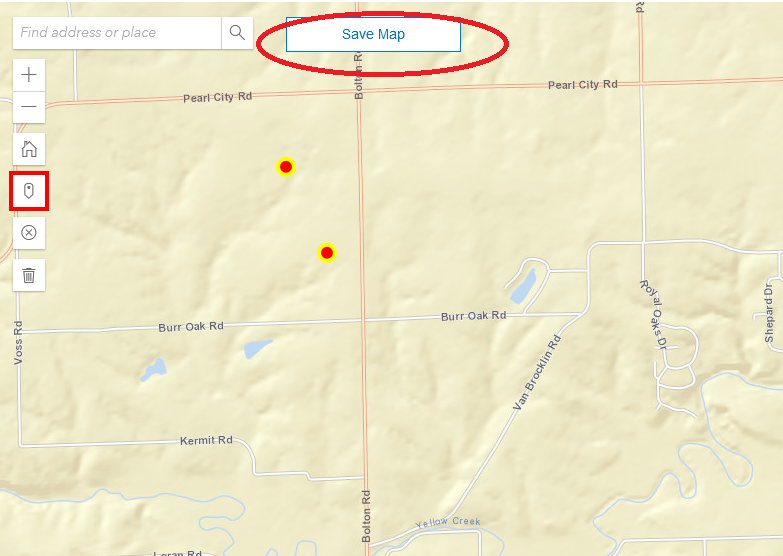
Next, you will need to map your project(s). Within the map interface, use the "+" and "-" to zoom in and out. Once you have identified your project location, select the point tool to activate the mapping tool, then click on the map to indicate the project location. Use Ctrl+Click to deselect a previously mapped point, or use the "garbage" icon to remove all points.
Once you have completed all mapping under this Activity Detail, be sure to save the map using the "Save Map" button inside the map interface.
Adding Activity Detail Indicators
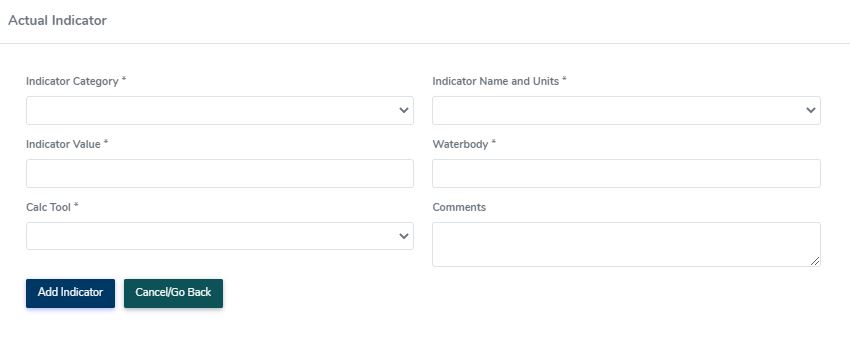
The final step of entering Activity Detail information is to enter Indicator information, also known as Pollution Reduction Estimates. For more information about calculating these estimates, visit Water Quality Tools and Models and eLINK Guidance: Choosing the Best Estimator.
After you have calculated the estimates/indicators, enter that information here, including:
- Indicator Category
- Indicator Name and Units
- Indicator Value
- Impacted Waterbody
- Calc Tool
- and any Comments,
- then click Add Indicator to save and return to the Activity Details screen.
Repeat the steps above to continue adding any remaining indicators.
After you have finished entering the practice attributes, mapping, and indicators and Saved all information, click Go Back to return to the Activity screen.
If you have an eLINK question, please email elinksupport@state.mn.us or if you encounter an eLINK error message please submit an elinksupport ticket via the Support form in eLINK.